
Object Removal
Removing a person or an object from a photo on your cell phone might seem complicated, but with modern apps and tools, it's easier than ever—even for non-tech-savvy users.

St, Paul de Vence, France: In the image above, there were other people nearby who did not add to the beauty of the photograph. Although we wanted to capture the charm of this old-world town, we could not control the other patrons. Thankfully, with the magic of Object Eraser, we were able to remove them, allowing the subjects to be the focus. The object removal here was more difficult, as there were people sitting on stools and on the steps. Unlike removing a skier from a snow-covered mountain, the pixels surrounding the patrons were all very different. The Object Eraser in Google Photos did an incredible job, and the resulting image is basically flawless.
How Does Object Removal Work? 🪄🖼️
Object Removal uses AI to fill in the space where something used to be by blending nearby pixels. It's kind of like patching a hole with pieces of the surrounding area!
✨ Best results? When the object is small, in the background, or surrounded by similar colors and textures—like a distant skier on a snowy hill or a tiny stain on a shirt.
⚠️ Heads-up! While the results can be amazing, they’re not always perfect—especially if you enlarge the photo or try to remove something big or complex. So use it thoughtfully for the best effect!
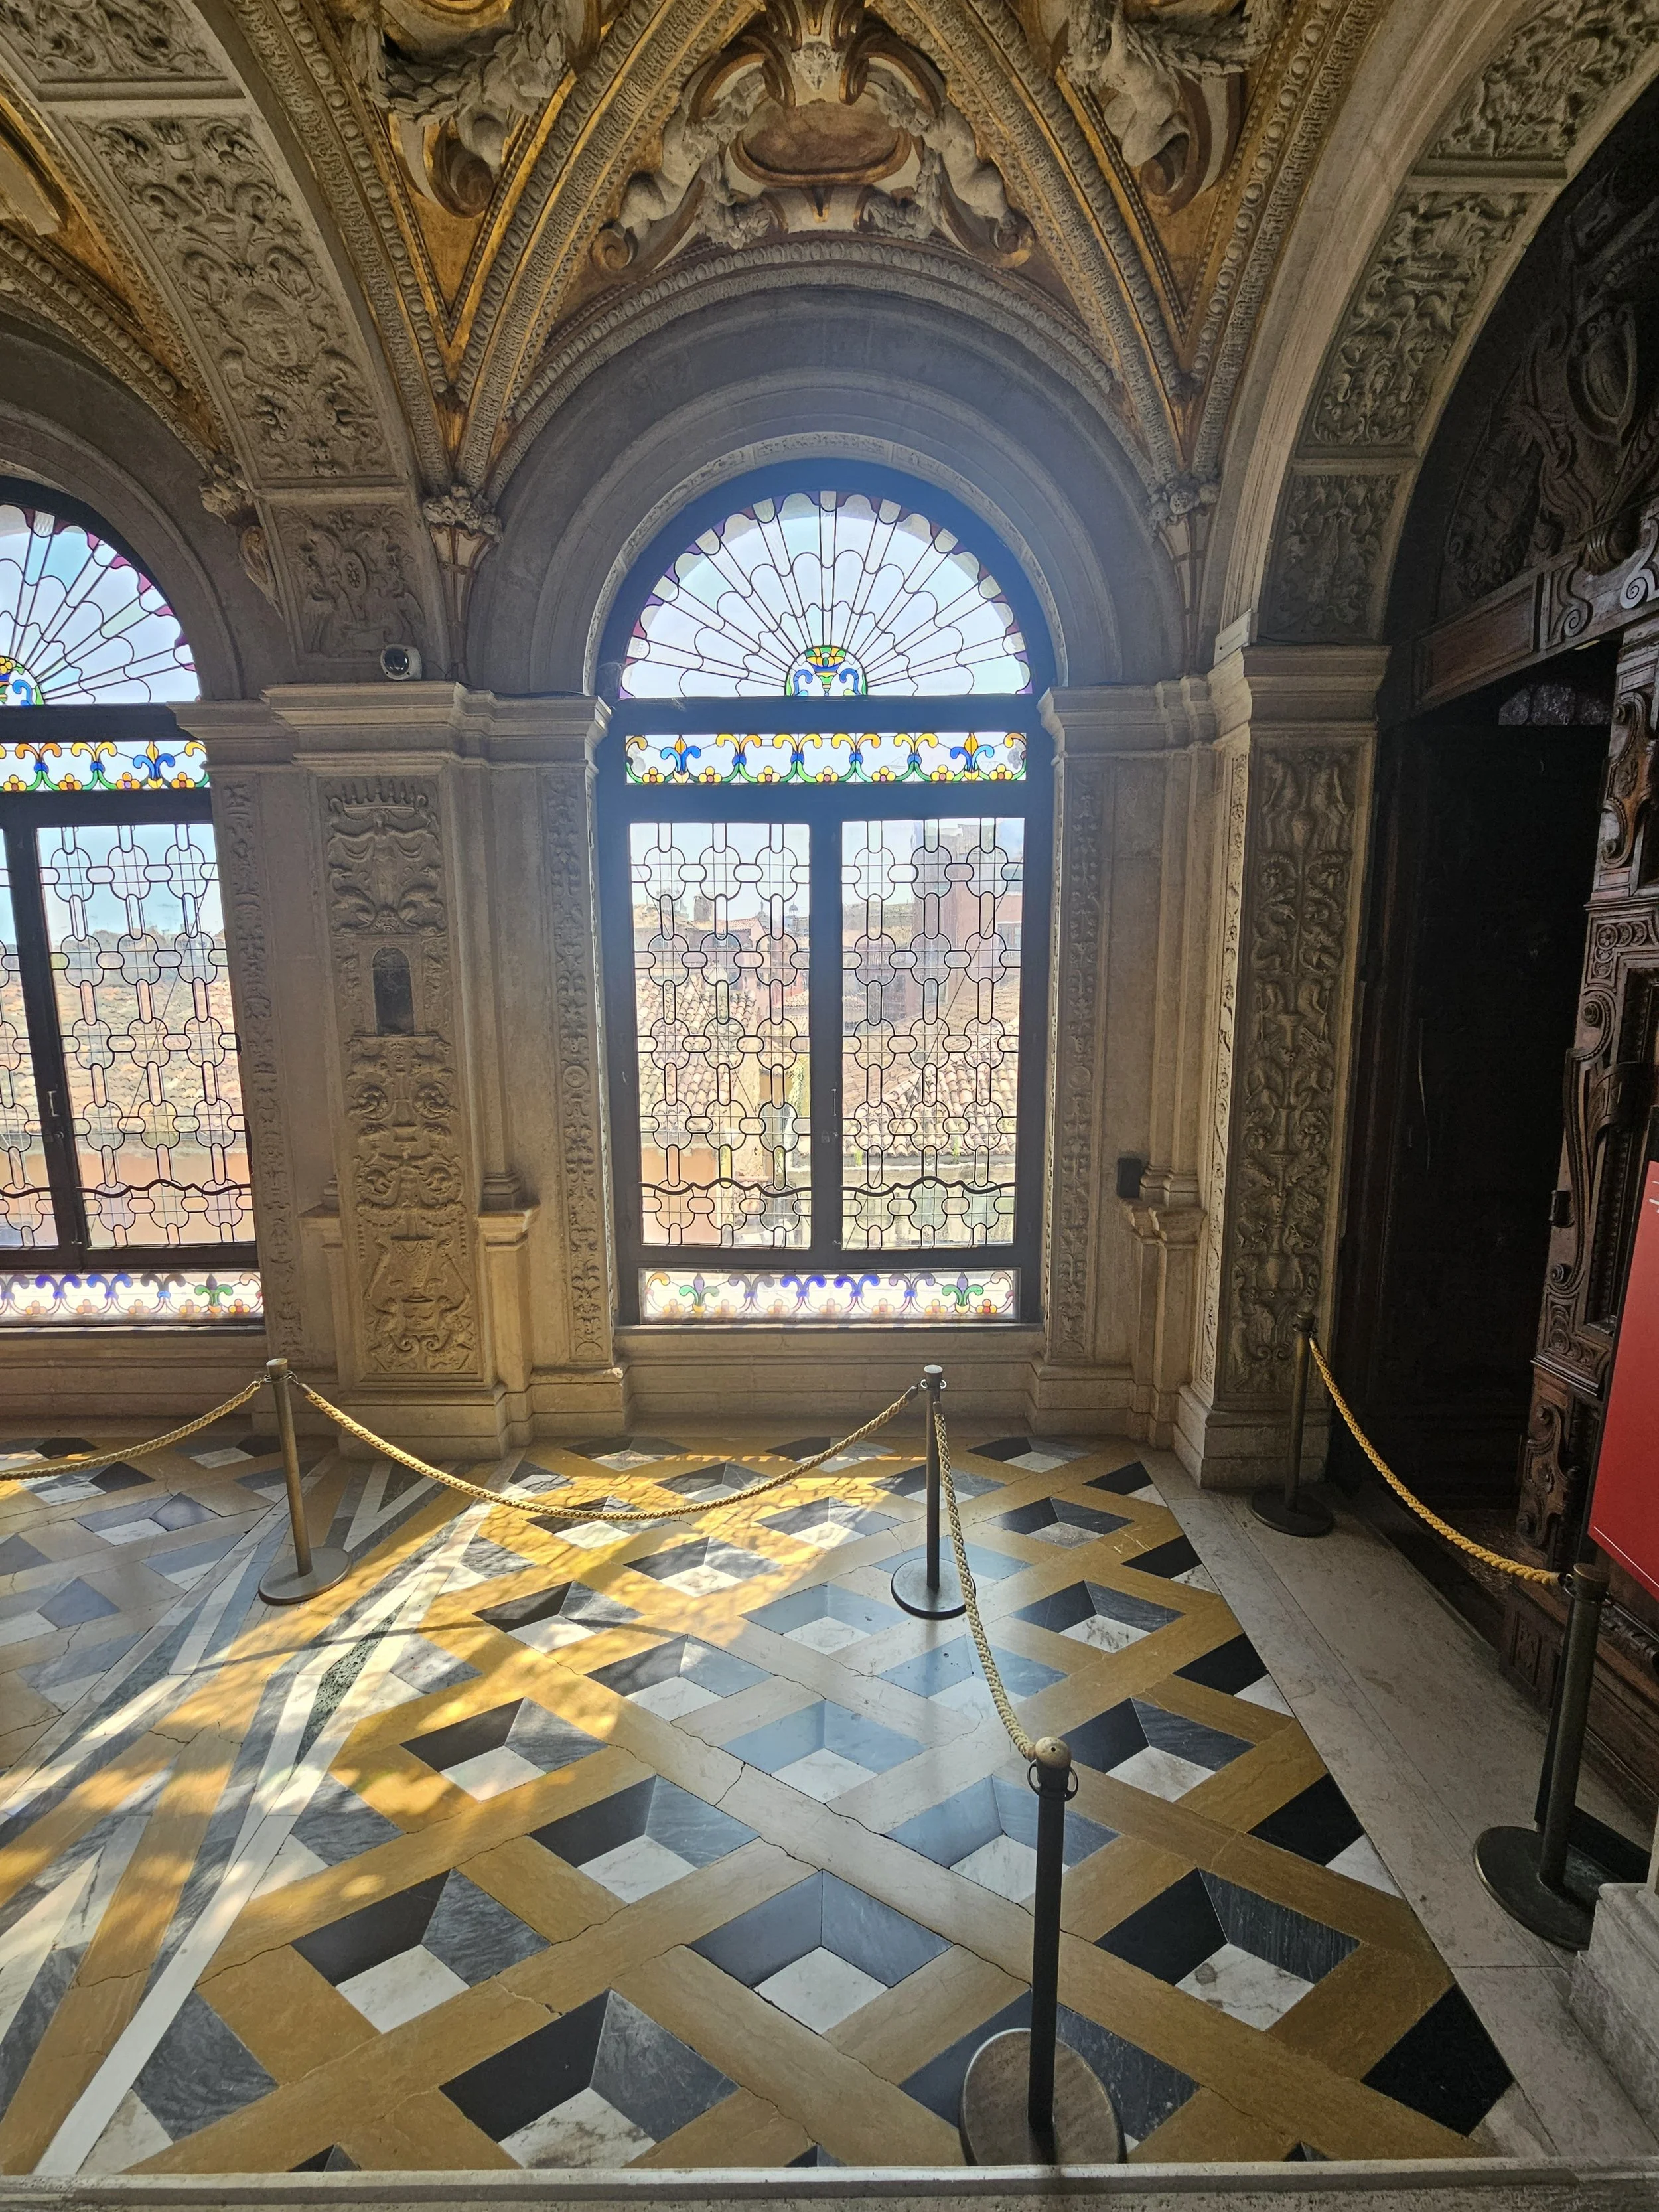
Tricky Patterns = Tricky Removals
In the example above, we’re working with a detailed marble floor inside a castle—complete with a grid pattern and those pesky tourist ropes in the way. This kind of object removal is much more complicated. Your phone’s editing tools may struggle to recreate fine details like the repeating marble design accurately. Zoom in on the new photos below to appreciate the failed effect. The floor design appears blurred. For a quick socia media post, the Object eraser works fine; however, if the photographer wished to enlarge or frame the image, the poor quality would disappoint!
For scenes like this, even skilled amateurs might find it challenging. In cases like these, it’s worth calling in a pro! Platforms like Fiverr.com offer affordable freelance editors who can clean up tricky photos without breaking the bank.

Venice, Italy: In St. Mark’s Square sits the magnificent Doge’s Palace (Palazzo Ducale)—a stunning example of Venetian Gothic architecture. But let’s be honest… those tourist ropes shown in the first photo kind of ruin the vibe. While it’s tempting to zap them out with an object eraser, this floor was way too detailed for a quick fix on our Android phone - at least in July 2025. Look closely at the blurs… The intricate patterns were more than our phone could handle. For difficult patterns, Google Photos object eraser may work better. Try both options if you are able as the result may be different and over time we are certain these Apps will evolve and become more sophisticated.
Android Object Removal
🧽 Object Removal on Android Phones
Many Android phones—especially Samsung Galaxy devices—offer built-in object removal tools that are quick and easy to use.
✅ Option 1: Samsung’s Object Eraser (Built-in on Many Models)
If you have a Samsung phone running One UI 4.1 or later (Android 12+), you likely have Object Eraser built right into the photo editor.
Here’s how to use it:
Open the Gallery app and select the photo you want to edit.
Tap Edit (the pencil icon).
Tap the three-dot menu in the corner and choose Object Eraser.
Draw over or tap on the object you want to remove.
Tap Erase—the tool will use AI to remove it seamlessly.
Save your changes.
💡 Works great for removing trash, power lines, photobombers, etc.
✅ Option 2: Use Google Photos (Pixel and Some Other Androids)
If you’re using a Pixel phone or have access to Google Photos' latest features:
Open the photo in Google Photos.
Tap Edit > Tools (on supported devices).
Choose Magic Eraser.
Tap or highlight what you want to remove, and it’ll suggest or auto-erase the distraction.
✅ Option 3: Third-Party Apps (for Any Android Phone)
If your phone doesn’t have a built-in object remover, try one of these:
TouchRetouch – Excellent object removal tool designed for mobile.
Snapseed – Free app with a solid “Healing” tool.
PhotoRoom – Great for removing backgrounds and cleaning up product or portrait shots.
Apple Object Removal
Apple added a built-in object removal tool in most recent models of the iphone; however it is called “Clean Up.”
Here’s how to use it:
🧽 Option 1: Clean Up
This works well for removing background objects if you want to isolate the subject.
Details coming soon.
✏️ Option 2: Use the Markup Tool (Manual Removal)
For basic cleanup:
Tap Edit > Markup.
Use the pen, marker, or highlighter to cover up small distractions.
Not ideal for complex objects, but can work in a pinch.
📲 Use a Third-Party App for True Object Removal
For AI-powered object removal, try one of these apps:
TouchRetouch (App Store link) – highly rated, made specifically for object removal.
Snapseed (by Google) – free, with a solid “Healing” tool.
Pixelmator – more advanced, Photoshop-like capabilities.
Before & After


Take a look at the paper cup in the bottom left corner—it was used to feed the turtle, but as a manmade item, it reads more like trash in the frame. It distracts from the natural beauty and unique features of the turtle itself. Using the Object Eraser tool on our Samsung phone, we were able to remove it quickly and seamlessly, instantly improving the photo’s focus and composition.
Snapseed (Free App)
Download Snapseed from your app store.
Open your photo in Snapseed, tap Tools, then select Healing.
Brush over the person or object, and the app will blend the background to fill the space.
Why It's Easy: User-friendly interface, free, and effective for most edits.
Adobe Photoshop Express (Free with In-App Purchases)
Open the app and load your photo.
Use the Spot Removal tool to tap on the person or object you want to remove.
Adjust the size of the tool for precise edits.
Why It's Easy: Offers guided tutorials and is designed for all skill levels.
TouchRetouch ($3.99 One-Time Purchase)
This app is specifically designed for object removal and is very beginner-friendly.
Simply highlight the person or object, and the app removes it seamlessly.
Why It's Easy: Dedicated to this one purpose, with an intuitive interface.
Google Photos Magic Eraser
Available on Google Pixel devices or with a Google One subscription on other phones.
Tap Edit, select Tools, and choose Magic Eraser. Highlight the unwanted object, and it will disappear.
Why It's Easy: Automated and quick, with minimal effort required.
Clone Tool in Editing Apps
Apps like PicsArt or Lightroom offer a cloning feature that copies a part of the background to cover the unwanted object.
Requires a bit more precision but is still straightforward with tutorials.
Use Online Tools (No Download Required)
Websites like Cleanup Pictures allow you to upload your image and remove objects with a brush tool.
Visit cleanup.pictures and follow the on-screen instructions.
Why It's Easy: No installation needed, works on your phone browser.
Ask for Help from Your Phone’s Assistant
AI features in apps like Google Photos or Apple Photos may suggest edits, including removing distractions, without manual effort.
Tips for Best Results:
Choose photos where the background is simple or uniform, as complex backgrounds may require more work.
Practice on a copy of the photo to avoid losing the original.
Start with free tools before purchasing apps to find what works best for you.
With these methods, even the least tech-savvy user can achieve impressive photo corrections!
Specialized Work
If you're looking for something more specialized or intricate, like perfectly removing a person from a detailed background or creating a highly polished image, you might need advanced tools or professional assistance. Here's how you can approach it:
Using Photoshop for Advanced Edits
Adobe Photoshop is the gold standard for photo editing, but it can be overwhelming for beginners.
Why Photoshop?
Photoshop provides powerful tools like the Content-Aware Fill or Clone Stamp Tool that can handle intricate edits, such as removing someone from a group photo or seamlessly blending complex backgrounds.How to Use It:
Install Photoshop on your computer or iPad.
Follow online tutorials for tools like Spot Healing Brush or Content-Aware Fill.
Save your image in high resolution.
Cons:
Requires a subscription (starting at $9.99/month for Photoshop and Lightroom).
Steeper learning curve for those unfamiliar with photo editing software.
Outsourcing on Fiverr or Similar Platforms
If the idea of editing feels daunting, hiring a professional on a freelance platform like Fiverr can be a quick and cost-effective solution.
How It Works:
Visit Fiverr or similar platforms like Upwork.
Search for “photo editing” or “object removal” services.
Browse freelancers’ portfolios to find someone whose style matches your needs.
Prices start as low as $5, depending on the complexity of the task and the editor’s experience.
What to Provide:
Upload your photo and clearly explain what you want to be removed or adjusted.
Specify any preferences for how the background should look after the edit.
Pros:
High-quality, professional results without learning advanced tools.
Saves time, especially for complex edits.
Cons:
Slight delay (usually 24–72 hours for delivery).
Costs can add up for multiple edits.
When to Choose Photoshop vs. Freelancers
Photoshop: Ideal for users who want to learn photo editing and frequently edit images.
Freelancers: Best for one-time edits or when you need flawless results without the effort.
Combining Both Options
If you want to experiment but also ensure a perfect outcome, you can try basic edits yourself using apps or tools like Snapseed. Then, send the image to a professional on Fiverr for final touches.
By leveraging these resources, you can handle everything from simple fixes to creating professional-grade images. Whether you’re using apps, advanced tools, or hiring help, there’s always an option that suits your time, skills, and budget!
Return to Edits & Effects Home Page
“A strong composition is the key to a strong image. Without it, no amount of editing can save a poorly structured shot.”